
This so-called password protection setting is made for protecting the word document itself, but sometimes you may forget the password and need to redact or modify the word files.
So here we will introduce 5 solutions to edit a protected or locked word document.
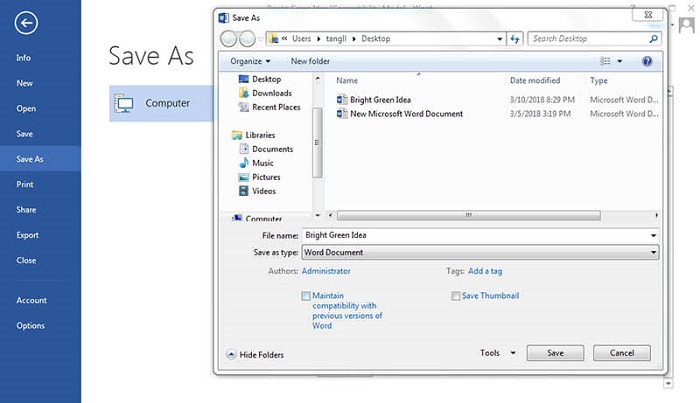
Under the condition of knowing nothing about the password, although in Read-only mode you can't modify content, you can remove this protection by Save as the option.
The steps to edit the protected word document are as follows:
Step 1. Open the password-protected Word document.
Step 2. Click on File on the top and choose Save as.
Step 3. Change another name for this new document and click on Save.

Now you can try to open and edit the newly saved document.
It is internal protection that causes failure of the edition. Therefore, to edit a password protected Word document, we can remove the protection by following steps:
Note: If your Word document has been encrypted for its opening, then this method is not workable. And, make sure that one editor has been installed on your PC because such an approach requires an editor.
Step 1. Open the protected file.
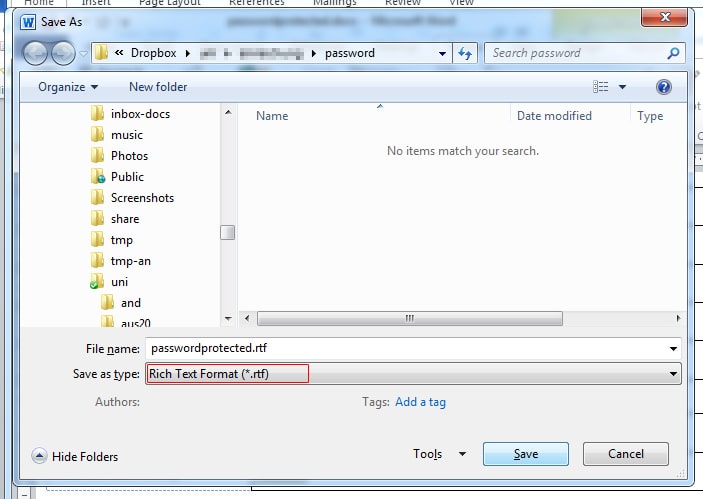
Step 2. Navigate to File and choose Save as.
Step 3. Save the document as "Rich-Text-Format (*.rtf)" and then close the document.
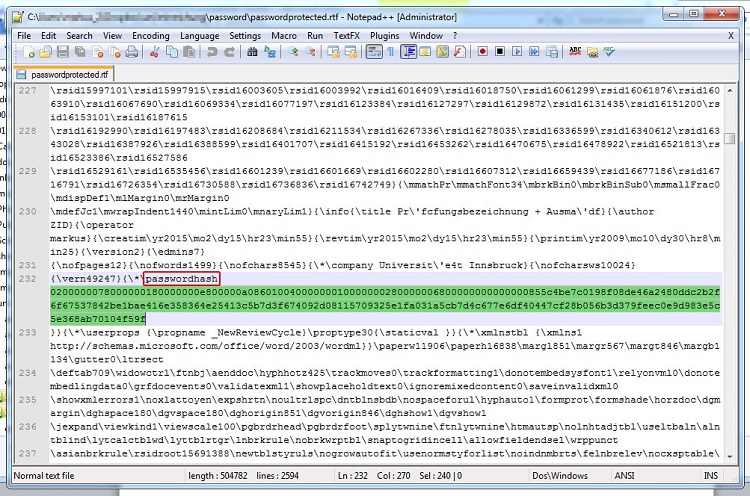
Step 4. Open the newly saved .rtf file with an Editor.
Step 5. Then tap Ctrl + F to search "passwordhash" and change it to other words like "nopassword" and save the settings.
Step 6. Now close the file and open it again in Word.
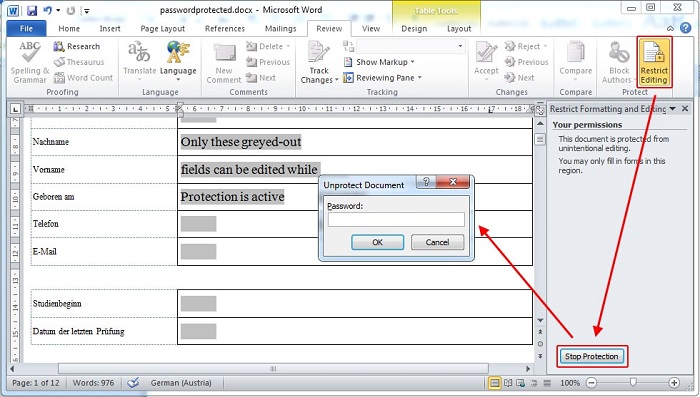
Step 7. Click on Review section and click on "Restricted Editing" and then "Stop Protection" (including uncheck the options marked in the picture).
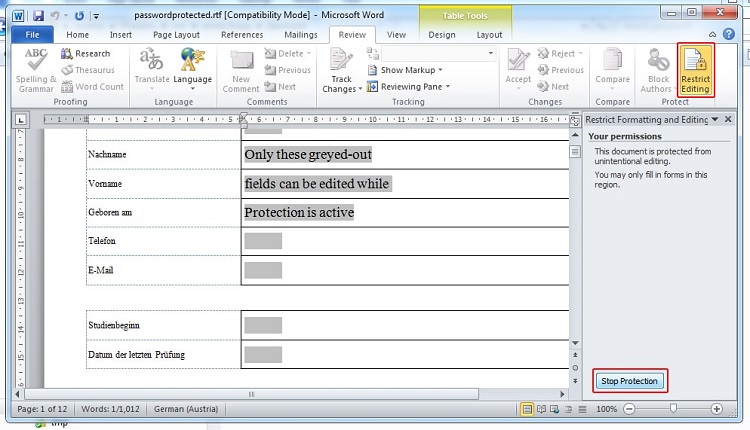
Step 8. Bravo! You have removed the protection in the document now and you can re-save it again to its original format.
That would be more fortunate and easier to unlock a word document for editing if you have already known the password. There are three simple steps to do so:
Step 1. Open the protected Word document and navigate to the Review section.

Step 2. Click on "Restricted Editing" and then "Stop Protection".
Step 3. Type the password when you are asked to do.
Then the protection will be removed or stopped after your confirmation. And you can edit a word doc now.
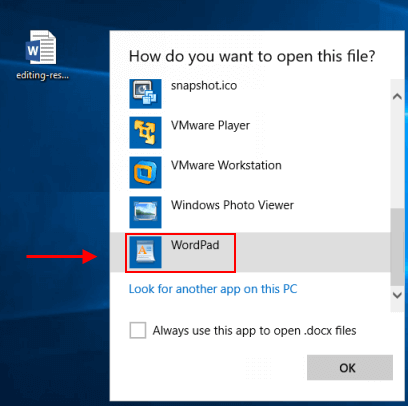
To edit a locked Word document, we can get help from Wordpad, a Free Word Processing Tool in Office Word, which helps to remove the editing restrictions.
Step 1. Right click on the locked document and choose Wordpad to open it.
Step 2. Next, you will be asked to save the document or save a copy as you like.
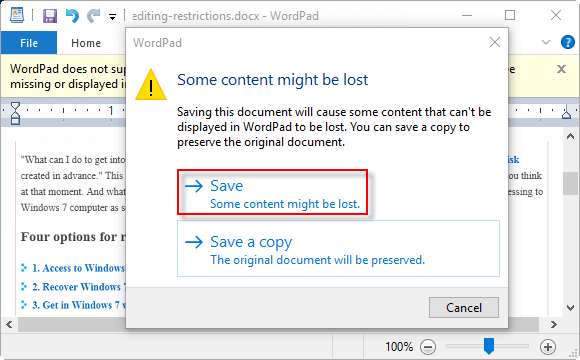
Step 3. After saving the document, the editing restriction has been successfully removed.
"Marked As Final" is also another edit restriction settings. To edit protected Word documents, we can cancel this option. Of course, every version of Word is slightly different in how to uncheck this setting.
In Office 2016
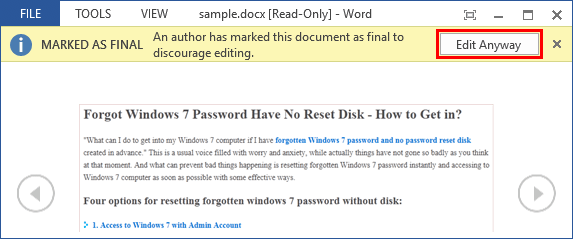
When you open a Word document, which has been marked as final, you will notice a tip that "An author has marked this document as final to discourage editing". You just need to click on "Edit Anyway" button on the right and then you can start your edition.
In Office 2007
In this version, several steps need to take to cancel this Save as Final setting:
Open the target document > Click on Office icon on the top-left corner > Choose Prepare option > You will find the Save As Final has been selected > Uncheck the option and your document can be edited again.
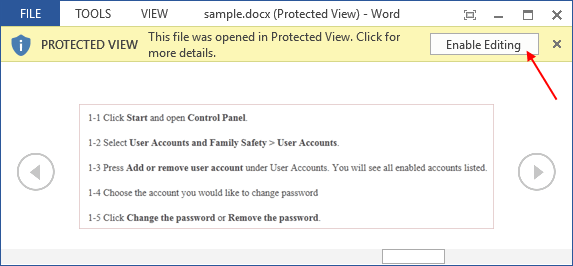
Protected View is the most important security improvement in Office 2010. Simply put, "Protected View" means that when you open a Web document Office document, Office 2010 will automatically enter a Read-only mode. It is also handy to get permissions to edit the locked document again without a password.
A yellow reminder will pop up on the top to inform potential threats in edition when you open a protected document. Only by clicking on the "Enable Editing" button can it be edited normally.
(This method is available for Microsoft Office Word 2016, Word 2013, Word 2010, and Word 2007.)
The above method introduces how to be permitted to edit the locked document, while in order to unlock word document for editing in Word 2010 & Word 2013.
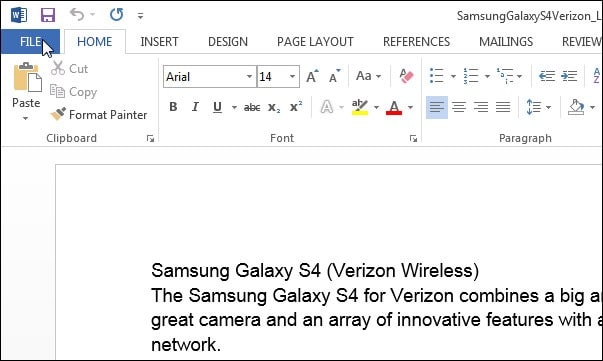
Step 1. Open the Word document and choose File on the top-left corner.
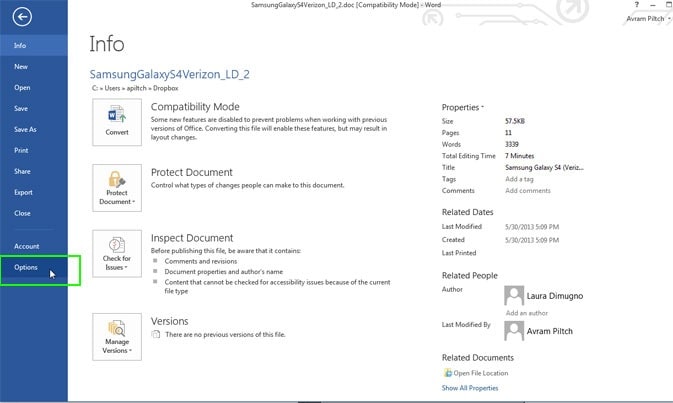
Step 2. Click on the Options button at the bottom.
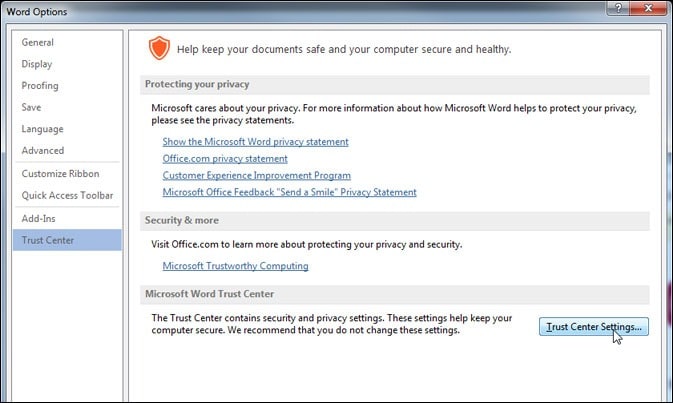
Step 3. Select Trust Center at the bottom of the left list and click on Trust Center Settings button.
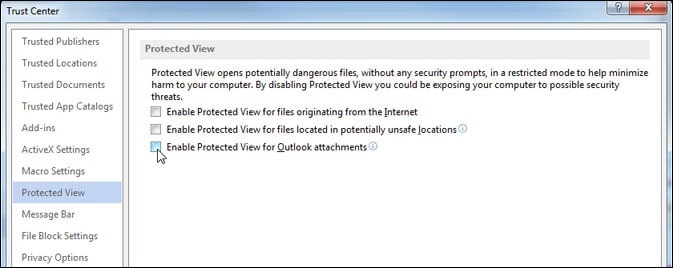
Step 4. Move to Protected View and uncheck all three boxes on the right.
Step 5. Click on OK to save the settings.
In any case, most of you prefer recovering the password to obtain a more reliable guarantee, which seems to be the user's consistent preference. So, in solving the problem of editing locked Word document, we also provide a way to retrieve passwords and unlock word files, let's take a look at it.
It's not difficult to recover the password in the end. Here we can use professional software to do it. Without trendy interfaces, Password Genius indeed provides powerful functions for password recovery, featuring a high recovery rate. And it also supports other file types besides Word.

Now let's see how to recover Word password with it!
Step 1. Download and install Password Genius on your PC, and then launch it.
Step 2. Choose "Recover Password for Files and Archives" and then "Word Password Recovery" mode.
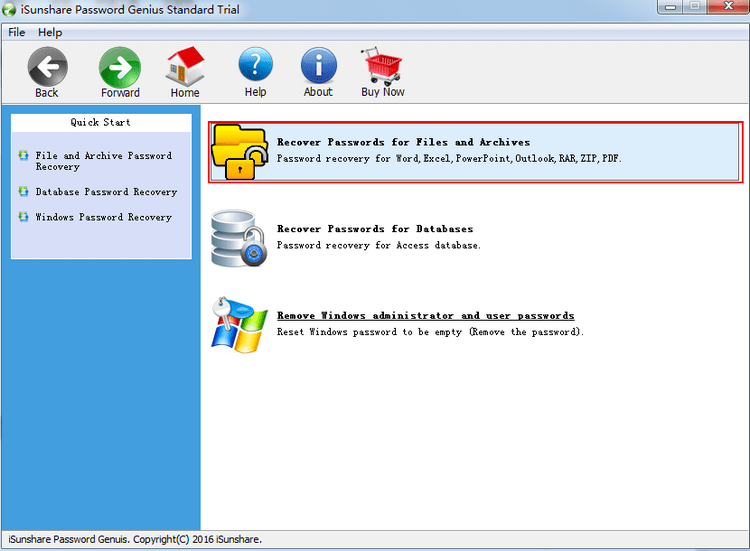
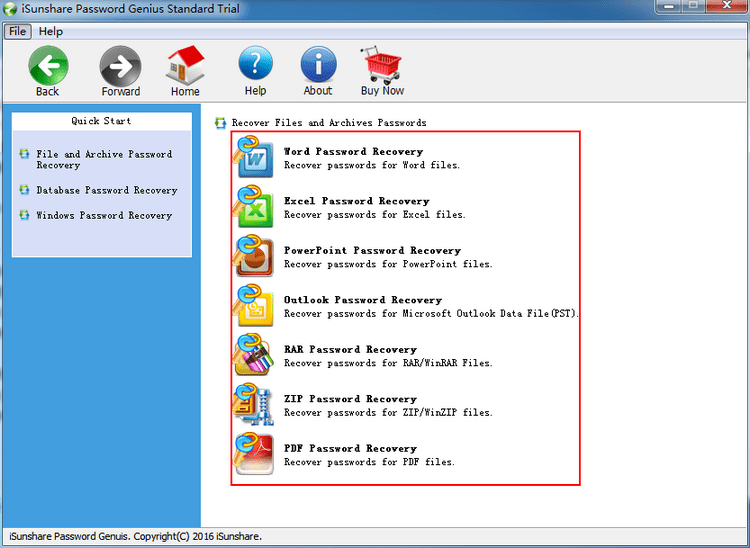
Step 3. Click on the folder icon where you can locate and select the target document you want to recover.
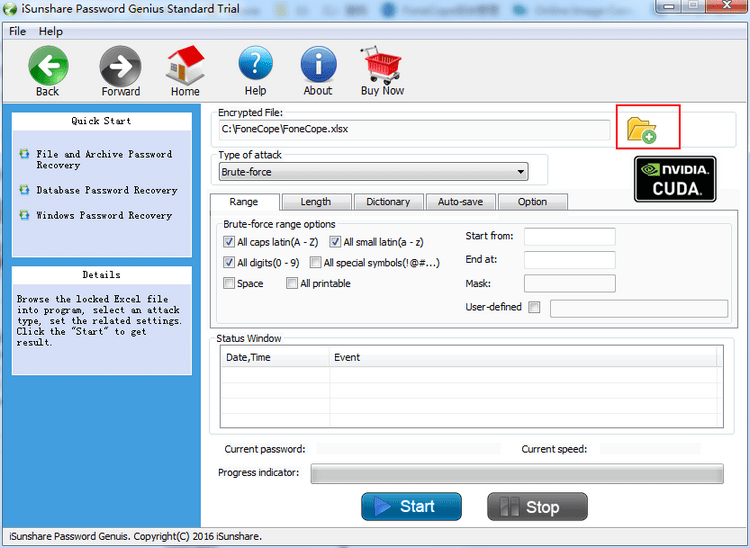
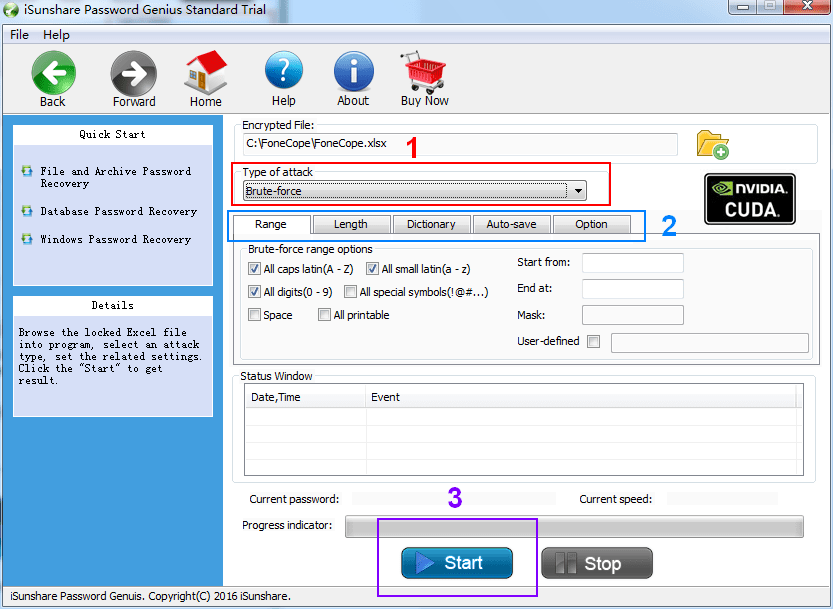
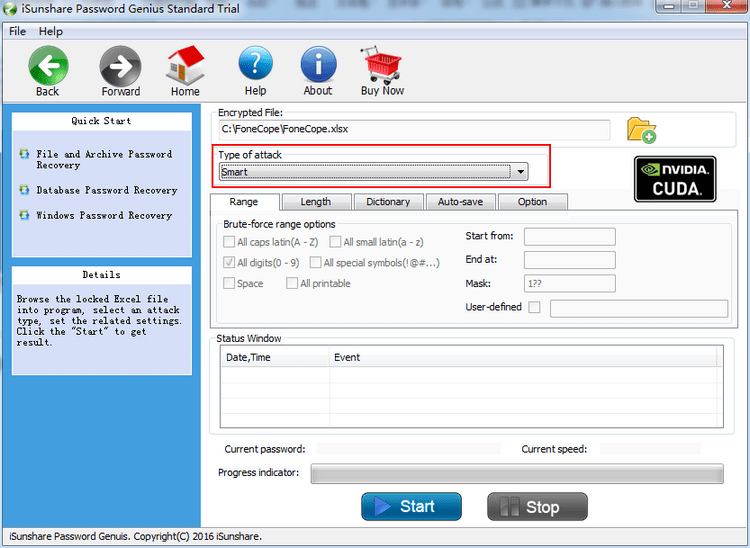
Step 4. Choose Type of Attack based on your own situation. (There are 4 major cases provided.)
 start recovering password protection from file" />
Step 5. Now after your choice and settings, you can click on the Start button. (Stop button is provided for a temporary pause of the progress.)
Step 6. Once the recovery finishes, you can see the password from the prompt. Click the Copy button and Open the Word document. Now you can type the password to edit the locked word file.
4 Major Cases of Type of Attack
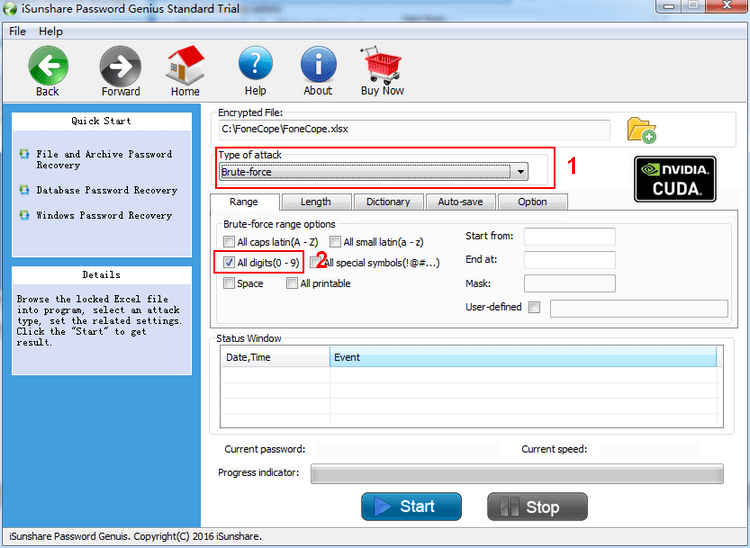
1. Brute-force
In this option, you have to detail the Length and Range, which contributes to lessening the time.
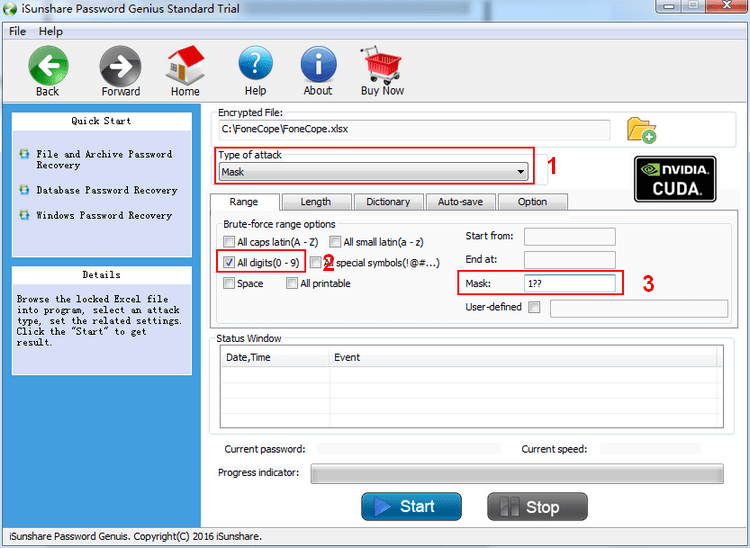
2. Mask
There would be several steps more in this case. Apart from choosing under the Range section, you are asked to type the number you know about the password and type "?" for the unknown ones.
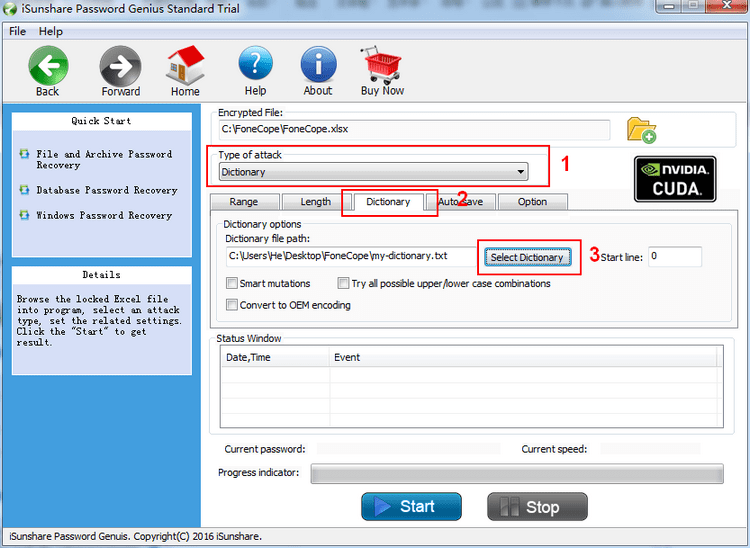
3. Dictionary
As the term suggests, this case will refer to some sources for password recovery. You either can use the provided default dictionary or create a unique TXT file where you need to input all passwords that you think possible. And then click on "Select Dictionary" to select the TXT file.
4. Smart
In this case, nothing needs to be set, and what you have to do is just clicking on the "Start" button to begin the progress.

What should I do if the cracking program has not been completed after running for a long time? It is a good idea to replace a tool. PassFab for Word not only provides three crack modes: Dictionary, Brute-force, and Brute-force with Mask, the important thing is that its cracking operation is faster. You can know the result soon!
After password recovery, you can use it to remove password encryption by:
Step 1. Typing the password to opening Word document, choosing File and then clicking on Info.
Step 2. Find Protect Document and then select Encrypt with Password
Step 3. Clean the box of the password and click on OK to save this setting.
Anyway, it's good to be able to edit a protected or locked word document successfully. It's also good to solve a problem and learn a skill at the same time. But when using the protection function in the future, we must keep the password in mind. Otherwise, it would waste time to decrypt or remove the protection.
That's all. If there is anything you want to speak out and share, leave a comment below.

Last Updated: June 24, 2020
![]()
Author: Elio G. M /
A smartphone geek who perseveres in generating esay-to-follow solutions to various Android and iPhone issues.