
In my blog post Running a Citrix lab in Amazon AWS I promised that I would create an similar guide for running Citrix Netscaler Gateway in Amazon AWS.
Like everything new, it takes a lot of time to learn and figure out the right steps. When working on this post I remembered back in the days when I configured my first Citrix Secure Gateway. It took me like a full week, but after repeating it over and over again I ended up doing a $5000 project in 4- 5 hours.
Now the same applies for Amazon, there’s a lot of new things to learn, because you no longer have a Networking guy to rely on. So let’s jump straight into it, be prepared this is going to be a very long post.
First we need to cover some basic Amazon acronyms:
So to be able to run Citrix Netscaler Gateway in Amazon AWS we need to create a VPC first.
From the AWS Management Console select VPC.

Click on the Start VPC Wizard.


We’re going to use the default IP configuration and give our VPC a name.

Then we need to create 2 more subnets for our VPC. I’m using 10.0.1.0/24 and 10.0.2.0/24. Make sure they belong to the same VPC and Availability Zone.

Now with the prerequisites completed we can head over to AWS Marketplace to install our Netscaler Gateway.
Search for Citrix Netscaler and pick the one you like best, I’m going with Citrix Netscaler VPX Platinum Edition – 10 Mbps with a 21 day free trail. This way I don’t need to worry about the licensing.
Before you Launch it with 1-Click you NEED to scroll down the page to set the correct Region and configure the VPC by clicking Setup.
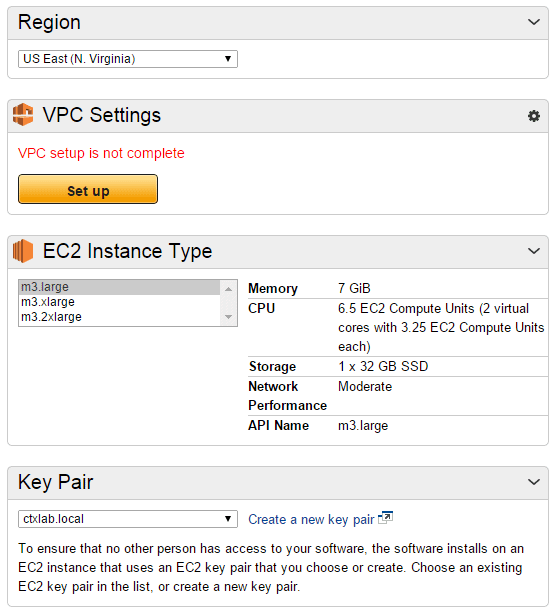
Here you see that the ENI Management Subnet is 10.0.0.0/24 (eth0) with a predefined Security Group from Citrix.

Scroll down the page to configure the other two. As you can see, there’s no Security Group configured, so by default all traffic is blocked. We will take a look at this later in the post.

Click Done and then launch with the 1 Click Button. Switch back to the EC2 Console and wait for it to complete.
When we check the Description of the instance you can see that the Citrix Netscaler Gateway appliance have 3 network cards or ENI’s like they’re refereed to in the documentation.

To be able to reach this instance we can connect through another instance (Jump Host) on the same VPC or assign a Elastic IP (EIP) to the Netscaler.
We also need another Elastic IP for the VIP so let’s create 2 Elastic IP’s. From the EC2 Dashboard click on Elastic IP’s and click Allocate New Address.
Select EIP used in VPC.
 Allocated New Address" width="400" height="206" />
Now with 2 addresses we need to associate them to the Netscaler instance.
Select Associate Address.


From the Description we now have 2 Public IP addresses for eth0 and eth2.